
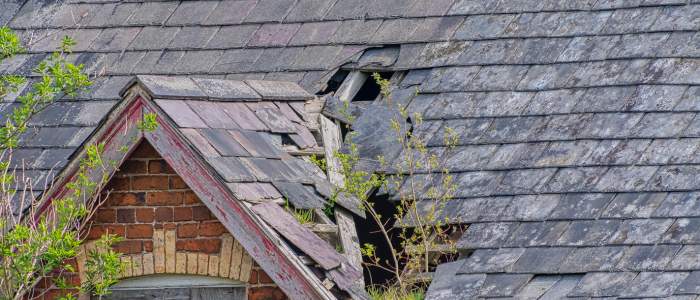
It starts as a stain. A small brown circle on your ceiling, barely the size of a dinner plate. You tell yourself it’ll stop when the rain does. It won’t. A roof leak is one of the most deceptive emergencies a homeowner faces — small on the surface, catastrophic beneath it. I’ve inspected homes where a single missed storm leak cost $40,000 in structural damage and mold remediation. It began with a missing shingle the size of your hand.
If water is entering your home right now, there is no time for regret. There is only time to act. This guide walks you through every step — in the exact order you should take them — from the moment you notice the leak to the moment a licensed roofer hands you a repair estimate.
Why Every Minute Counts
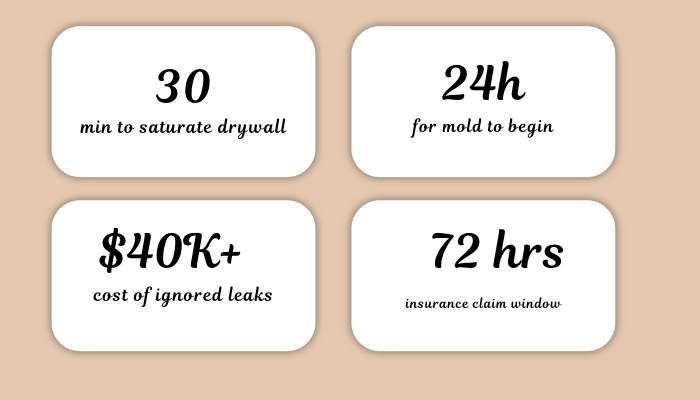
Water is the most destructive force in a home, and it moves faster than most people expect. Within 30 minutes, ceiling drywall begins to saturate. Within an hour, water is tracking along wall cavities and insulation, spreading far beyond the visible stain. Within 24 to 48 hours, conditions are ideal for mold colonies to establish — and once mold sets in, remediation costs multiply.
The visible damage you see is almost never the full picture. Water follows the path of least resistance, which means it travels along rafters, pools in hidden cavities, and drips down far from the actual entry point. What looks like one small leak could be feeding several damage zones simultaneously.
“The worst roof leaks I’ve dealt with weren’t caused by missing shingles. They were caused by homeowners who waited two weeks to call.”— Mike Callahan, Licensed Master Roofer
The good news: if you act within the first few hours, you can dramatically limit the damage. Most homeowner’s insurance policies also require notification within 24 to 72 hours of a loss event — so speed isn’t just about protecting your home, it’s about protecting your claim.
The 7 Emergency Steps — In Order
Do not skip ahead. Each step protects you, your family, and your property — and sets you up for a successful insurance outcome.
Check for electrical hazards — immediately
Before anything else: if the leak is anywhere near a light fixture, ceiling fan, outlet, or junction box — go to your breaker panel and shut off power to that circuit right now. Water and electricity is a lethal combination. Don’t assume wiring is protected. Shut the circuit first, ask questions later.
Move people, pets, and valuables out of the zone
Relocate furniture, electronics, documents, and irreplaceable items immediately. Water always spreads further than you see — it travels along joists, pooling in areas far from the visible drip. Cover large items with plastic sheeting. A single piece of water-damaged furniture can easily cost more than the roof repair itself.
Deploy buckets, towels, and tarps
Place buckets under every active drip. Line the floor with absorbent towels as a secondary layer. Prioritize the fastest drip first, then work outward. Wring out and replace towels frequently — waterlogged towels stop absorbing and spread water further across your floor.
Relieve any bulging ceiling sections — don’t skip this
If you see your ceiling sagging or bulging, that cavity is filling with water. Left alone, it will collapse under its own weight — releasing everything at once and causing far more damage. Use a screwdriver to puncture the lowest point of the bulge and let it drain in a controlled way into a bucket. Stand to the side, not directly beneath. This feels counterintuitive, but it’s always the right call.
Inspect your attic with a flashlight
Once the immediate situation is contained, go into your attic. Look for wet insulation, water running along rafters, or daylight visible through the roof deck. Remember: the entry point is almost always several feet uphill from where it drips through your ceiling. Mark the suspected area with tape — your roofer will need to know where to look. Do not go onto the roof during active rain or wind.
Document everything — before you clean up a single thing
Photograph and video the leak source, all water-damaged surfaces, and any damaged belongings. Get wide shots and close-ups. Date and timestamp everything. This documentation is your insurance claim. Without it, you’re relying on an adjuster’s after-the-fact assessment, which almost always undervalues the true damage.
Call a licensed roofer — and your insurer
Most reputable roofers offer 24/7 emergency tarping services and can have a waterproof tarp over the affected area within hours. When you call, tell them where the leak is, how long it’s been active, and what you found in the attic. Also call your insurance company — notification within 24 to 72 hours is a requirement in most policies.
Critical Safety Rule
Never go onto a wet, icy, or moss-covered roof. Never touch electrical fixtures that are wet or near active water intrusion. Move everyone out of rooms where water is near electrical sources before anything else.
What’s Causing Your Leak
Understanding the source helps you communicate effectively with your contractor and set realistic expectations for the repair scope. Here are the most common culprits found on emergency calls.
Failed flashing
The single most common cause. Cracked or lifted flashing around chimneys, skylights, vents, and wall junctions lets water enter directly — even if the rest of the roof looks perfect.
Missing or cracked shingles
Wind, hail, and age cause shingles to crack, lift, or blow off entirely. One missing shingle during a heavy storm is enough to allow significant water intrusion into the underlayment below.
Clogged gutters & ice dams
Blocked gutters force water to back up under shingles at the eaves. In winter, this creates ice dams — walls of ice that redirect meltwater directly into your home’s structure.
Cracked pipe boots
Rubber seals around plumbing vent pipes typically degrade within 10–15 years. A cracked or shrunk pipe boot is a direct water entry point that’s nearly invisible from the ground.
Aged underlayment
On roofs over 20 years old, the underlayment beneath shingles often becomes brittle and cracked. Even decent-looking shingles above can’t compensate for failed underlayment below.
Failing roof valleys
Where two roof planes meet, heavy rain channels can overwhelm deteriorated valley flashing — especially common after several seasons of heavy rainfall or snowmelt cycles.
Typical Repair Costs at a Glance
| Cause | Urgency | Typical Cost |
|---|---|---|
| Flashing failure | Immediate | $200 – $600 |
| Missing shingles | Immediate | $150 – $400 |
| Cracked pipe boot | Immediate | $100 – $300 |
| Valley failure | Within 48 hrs | $300 – $1,200 |
| Ice dam | Within 48 hrs | $400 – $2,000 |
| Aged underlayment | Full assessment | Partial or full replacement |
Temporary Fixes That Actually Work
If you can safely access the roof — or the leak source is reachable from the attic — these temporary measures can dramatically slow ongoing water intrusion while you wait for professional repair.
Emergency roof tarp: The gold standard temporary fix. A heavy-duty polyethylene tarp anchored over the damaged area stops water entry completely. Professional roofers can install these in under an hour. If doing it yourself, the tarp must extend at least four feet beyond the damaged area in all directions and be secured with weights or battens — not just rope.
Roofing tape and roof cement: For small cracks, gaps around flashing, or minor shingle splits, self-adhesive butyl or rubberized asphalt tape applied to a dry surface can seal minor entry points quickly. Roof cement works similarly and is available at hardware stores for under $15. Both are short-term measures — expect two to four weeks of protection at most before a proper repair is needed.
Plywood over an opening: If a large section of roofing is missing entirely, a sheet of plywood anchored over the opening provides temporary structural protection until permanent repairs can be made.
Pro Tip
Always tell your roofer exactly what temporary measures you’ve taken before they arrive. The type of temporary fix in place affects their repair approach and the materials they bring to the job.
Filing Your Insurance Claim the Right Way
A roof leak caused by a storm, hail, or sudden event is almost always covered under standard homeowner’s insurance. But the way you handle the first 24 to 48 hours determines how smoothly — and how fully — your claim is paid out.
Call within 24 to 72 hours. Most policies have strict notification requirements. Waiting longer risks your coverage. Give a brief account of when the leak started and what caused it.
Do not clean up before documenting. Your photos and video from Step 6 are your claim. An insurance adjuster needs to see damage as it was — not after you’ve started repairs and cleanup. Document first, clean second, always.
Keep every receipt. Tarps, buckets, temporary repair materials, and even hotel stays if your home becomes uninhabitable — these are all potentially recoverable costs under most policies. Keep every receipt from the moment the leak starts.
Request a roofer at the adjuster’s inspection. Adjusters work for the insurance company, not for you. A licensed roofer present during the inspection advocates for the full scope of damage — including hidden damage that an adjuster might miss or undervalue. This is one of the highest-value steps a homeowner can take.
Know Your Rights
If your initial settlement seems low, you have the right to dispute it with a supplemental claim or by hiring a public adjuster. Underpayment on roof claims is extremely common — don’t accept the first offer without comparing it to your contractor’s written estimate.
After the Emergency Is Over
Once the immediate crisis is handled, use it as your wake-up call. A professional inspection after any leak event is not optional — it is the only reliable way to determine how extensive the damage really is, and whether you’re facing a targeted repair or a broader problem with the roof system.
Roofs don’t fail overnight. They send warning signs weeks, months, sometimes years before they give out. Curling or missing shingles, granules collecting in your gutters, daylight visible in the attic, staining around flashing — all of these are signals that precede a leak. The difference between a $400 repair and a $15,000 replacement almost always comes down to one thing: how early you paid attention.
But when the leak is happening right now — in the middle of a storm, in the middle of the night — there is no time for regret about missed warning signs. There is only time to act. Protect your people. Contain the water. Document the damage. Call the professionals. Your home is worth protecting, and so is everything — and everyone — inside it.
FAQs
Should I go on the roof while it’s still raining?
Absolutely not. A wet roof is extremely dangerous — slippery, unstable, and especially risky in wind or low light. Stay inside, contain the water with buckets and towels, and call a licensed roofer who has proper safety equipment
Will my homeowner’s insurance cover a roof leak?
Generally yes — if a sudden storm, hail, or wind caused it. Gradual wear and neglect are typically not covered. Document damage immediately, notify your insurer within 72 hours, and have a roofer present during the adjuster’s inspection.
How do I find where the leak is actually coming from?
Water travels before dripping — the ceiling stain is rarely directly below the entry point. Go into the attic with a flashlight and look uphill from the stain for wet insulation, running water along rafters, or visible daylight through the roof deck.
Final thought
Your roof doesn’t fail without warning — it whispers for months before it breaks. The gap between a $300 repair and a $30,000 disaster is almost always attention. When a leak strikes, don’t freeze — move fast, document everything, and get professionals involved immediately. Once the crisis passes, schedule a full inspection. What you can see is never the full story. Protect your home like it’s the most valuable thing you own — because for most people, it is.